How to build a LiveKit AI Agent for real-time Speech-to-Text
LiveKit allows you to build real-time audio and video applications - learn how to add a real-time Speech-to-Text agent to your LiveKit application in this tutorial.


LiveKit is a powerful platform for building real-time audio and video applications. They build on top of WebRTC to abstract away the complicated details of building real-time applications, allowing developers to rapidly build and deploy applications for video conferencing, livestreaming, interactive virtual events, and more.
Beyond the core real-time capabilities, LiveKit also provides a flexible agents system, which allows developers to incorporate programmatic agents into their applications for additional functionality. For example, you can incorporate AI agents to add Speech-to-Text or LLM capabilities to build multimodal real-time AI applications.
In this guide, we'll show you how to add real-time Speech-to-Text to your LiveKit application using AssemblyAI's new Python LiveKit integration. This allows you to transcribe audio streams in real-time so that you can do backend processing, or so you can display the transcriptions in your application's UI. Here's what we'll build today:
We'll get started with an overview of LiveKit and its constructs, but if you're already familiar with LiveKit you can jump straight to the code here. You can find the code for this tutorial in this respository. Let's get started!
LiveKit basics
LiveKit is an extremely flexible platform. It is open-source, allowing you to self-host your own infrastructure, and they offer a wide range of SDKs to build real-time applications on top of clean interfaces in an idiomatic way.
At the core of a LiveKit application is a LiveKit Server. Users connect to the server and can publish streams of data to it. These streams are commonly audio or video streams, but any arbitrary data stream can be used. Additionally, users can subscribe to streams published by other users.
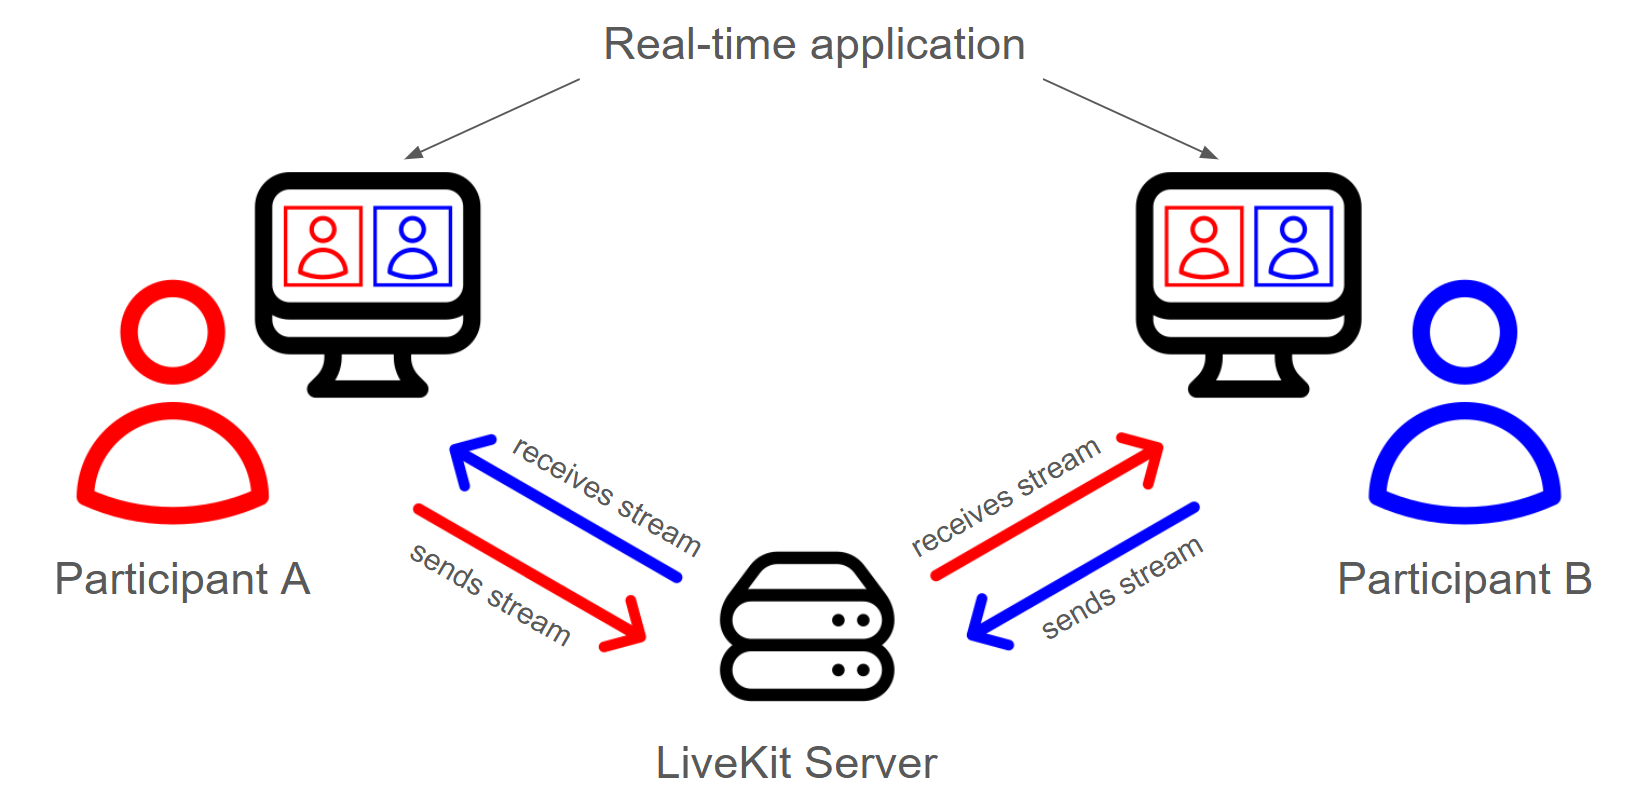
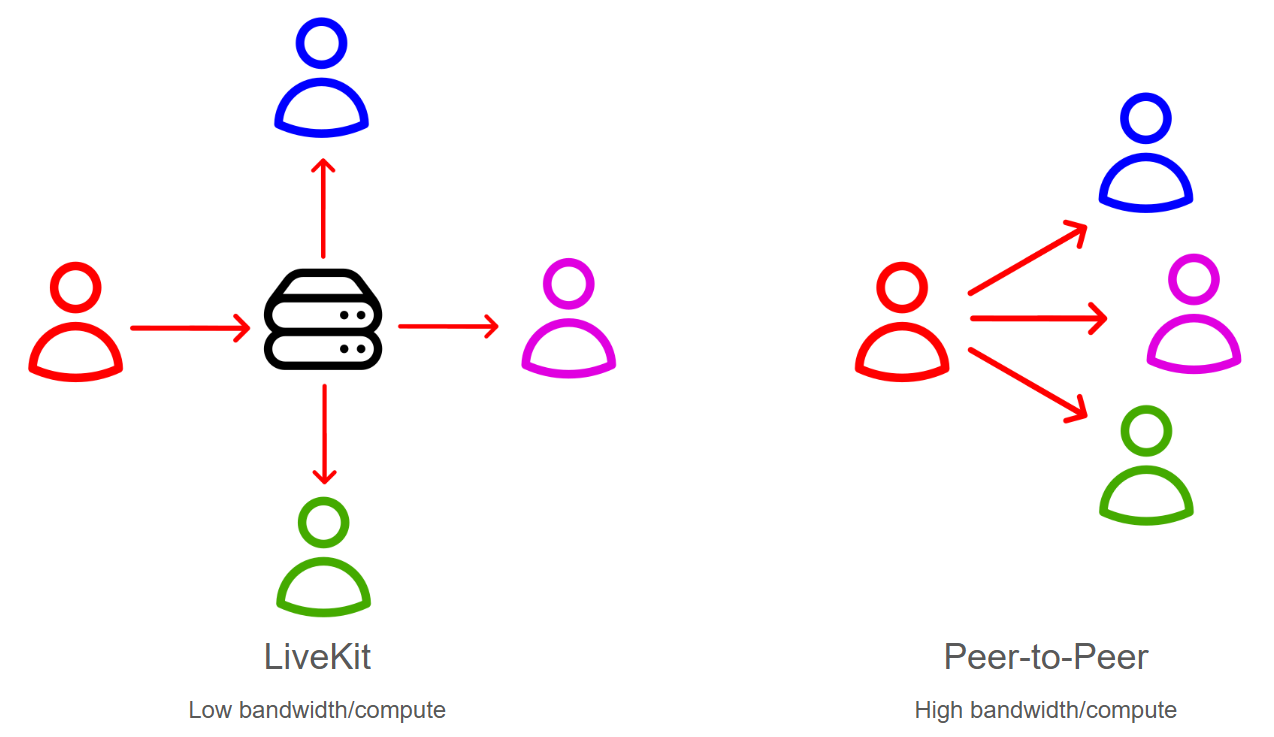
The LiveKit Server acts as a Selective Forwarding Unit, which is a fancy way of saying that it accepts all of these incoming streams and sends (forwards) them to the appropriate users (i.e. selectively). In this way, the LiveKit Server is a central orchestrator which prevents the need for peer-to-peer connections between all users, which would drastically drive up bandwidth and compute requirements for applications with many users. Additionally, the LiveKit server can send lower bitrate/resolution videos for e.g. thumbnail views, further lowering bandwidth requirements. This approach is what allows LiveKit applications to seamlessly scale to large numbers of users.
Additionally, since LiveKit is unopinionated by providing a simple mechanism to exchange real-time data (the publication/subscription of streams), LiveKit is flexible enough to build a litany of real-time applications.
LiveKit constructs
With this general context in mind, we can now cast this information in terms of LiveKit verbiage. LiveKit has three fundamental constructs - participants, tracks, and rooms.
Participants are members of a LiveKit application, which means they are participating in a real-time session. Participants can be end-users connecting to your application, processes that are ingesting media into or exporting it from your application, or AI agents that can process media in real-time.
These participants publish tracks, which are the streams of information mentioned above. These streams will generally be audio and video for end-users, but could also be, for example, streams of text as we will see in this tutorial, where our AI Agent that performs Streaming Speech-to-Text will publish a stream of the transcripts.
The participants are members of rooms, which are logical groupings of participants that can publish and subscribe to each other's tracks (subject of course to your applications permissions and logic). Participants in the same room receive notifications when other participants make changes to their tracks, like adding, removing, or modifying them.
For additional information, including the fields/attributes of the relevant objects, check out LiveKit's Docs. Now that we have the overarching basics of LiveKit down, let's see what it actually takes to build a LiveKit application.
Getting started with LiveKit
In order to build a LiveKit application with real-time Speech-to-Text, you'll need three essential components:
- A LiveKit Server, to which the frontend will connect.
- A frontend application, which end-users will interact with
- An AI Agent that will transcribe the audio streams in real-time
Let's start by setting up the LiveKit Server.
Step 1 - Set up a LiveKit server
LiveKit is open-source, which means you can self-host your own LiveKit server. This is a great option if you want to have full control over your infrastructure, or if you want to customize the LiveKit server to your specific needs. In this tutorial, we'll use the LiveKit Cloud service, which is a hosted version of LiveKit that is managed by the LiveKit team. This will make it easy for us to get up and running quickly and is free for small applications.
Go to livekit.io and sign up for a LiveKit account. You will be met with a page that prompts you to create your first app. Name your app streaming-stt (streaming Speech-to-Text), and click "Continue". After answering a few questions about your use-case, you will be taken to the dashboard for your new app:
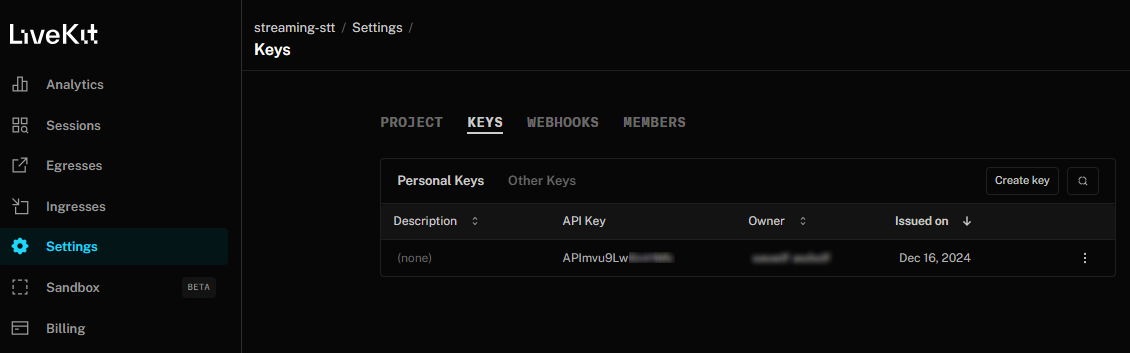
Your dashboard shows information about your LiveKit project, which is essentially a management layer for your LiveKit server. You can find usage information, active sessions, as well as what we're interested in - the server URL and the API keys. Go to Settings > Keys and you will see the default API key that was created when you initialized your project:
In a terminal, create a project directory and navigate into it:
mkdir livekit-stt
cd livekit-stt
Inside your project directory, create a .env file to store the credentials for your application and add the following:
LIVEKIT_URL=
LIVEKIT_API_KEY=
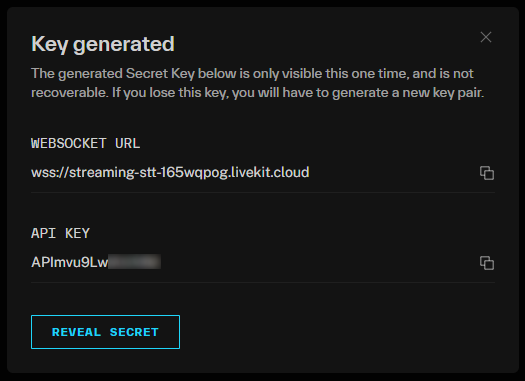
LIVEKIT_API_SECRET=Back on the Keys page in your LiveKit dashboard, click the default API key for your app. This will display a popup modal where you can copy over each of the values and paste them into your .env file (you will have to click to reveal your secret key):
Your .env file should now look something like this:
LIVEKIT_URL=wss://streaming-stt-SOME_NUMBER.livekit.cloud
LIVEKIT_API_KEY=SHORT_ALPHANUMERIC_STRING
LIVEKIT_API_SECRET=REALLY_LONG_ALPHANUMERIC_STRING
Note: Your .env file contains your credentials - make sure to keep it secure and never commit it to source control.
Step 2 - Set up the LiveKit Agents Playground
Now that our server is set up, we can move on to building the frontend application. LiveKit has a range of SDKs that make it easy to build in any environment. In our case, we'll use the LiveKit Agents Playground, which is a web application that allows you to test out the LiveKit agents system. Using this playground will allow us to quickly test out the Speech-to-Text agent that we'll build in the next section. The Agents Playground is open-source, so feel free to read through the code for inspiration when you're building your own project.
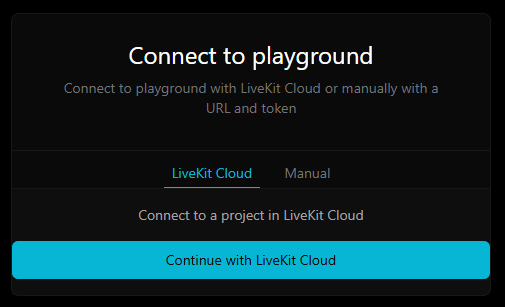
Additionally, we don't even have to set up the Agents Playground ourselves - LiveKit has a hosted version that we can use. Go to agents-playground.livekit.io and you will be either automatically signed in, or met with a prompt to connect to LiveKit cloud:
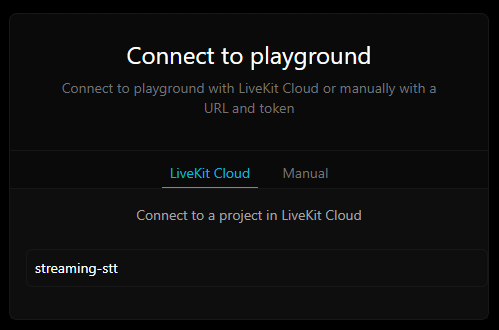
Sign in if prompted, and select the streaming-stt project to connect to it:
You will be taken to the Agents Playground which is connected to a LiveKit server for your streaming-stt project. On the right, you will see the ID of the room you are connected to, as well as your own participant ID.
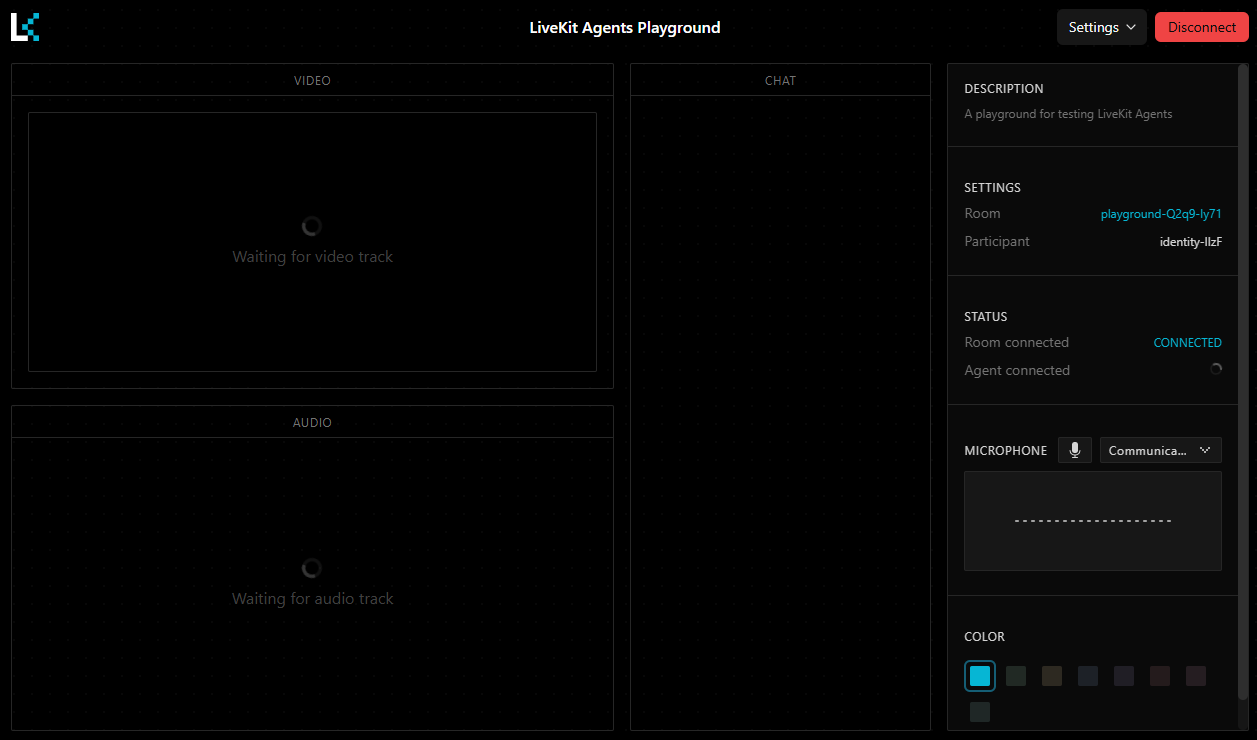
You can disconnect for now by clicking the button in the top right - it's time to build our Speech-to-Text agent!
Step 3 - Build a real-time Speech-to-Text agent
You'll use AssemblyAI to power the Speech-to-Text of your AI agent, so you'll need to get an API key before we start writing code. You can get an API key for free here.
Once you have done so, you can find your API key in the API Keys section of your dashboard:
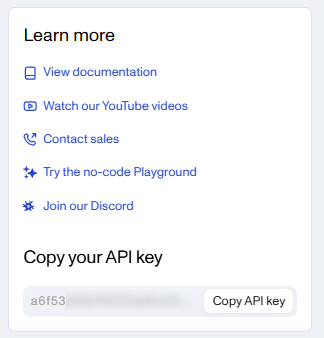
Copy it, and paste it into your .env file:
ASSEMBLYAI_API_KEY=YOUR-KEY-HERENow we're ready to start coding. Back in your project directory, create a virtual environment:
# Mac/Linux
python3 -m venv venv
. venv/bin/activate

# Windows
python -m venv venv
.\venv\Scripts\activate.bat
Next, install the required packages:
pip install livekit-agents livekit-plugins-assemblyai python-dotenvThis command installs the LiveKit Python SDK, the AssemblyAI plugin for LiveKit, and the python-dotenv package which you'll use to load your environment variables from your .env file. Note that we are installing LiveKit Agents version 0.x because of interface changes in version 1.0, which was released after the writing of this blog.
Now it's time to build the agent, which will be based on an example from LiveKits examples repository. Create a new Python file in your project directory called stt_agent.py and add the following:
import logging

from dotenv import load_dotenv

from livekit.agents import (
    Agent,
    AgentSession,
    AutoSubscribe,
    JobContext,
    MetricsCollectedEvent,
    RoomOutputOptions,
    StopResponse,
    WorkerOptions,
    cli,
    llm,
)
from livekit.plugins import assemblyai

load_dotenv()

logger = logging.getLogger("transcriber")
We start with our imports, load our environment variables, and then instantiate a logger for our agent. Now we can move on to the writing the main agent code.
In livekit agents v 0.x, we previously had to manually define the agent's behavior when it subscribed to a track, adding a custom function to asynchronously handle the incoming audio stream and outgoing text stream.
Since the release of LiveKit Agents 1.0, creating an Agent for real-time Speech-to-Text is much simpler. First, we will create a Transcriber class, which defines the behavior of our Speech-to-Text agent. Add the following code to stt_agent.py:
class Transcriber(Agent):
    def __init__(self):
        super().__init__(
            instructions="not-needed",
            stt=assemblyai.STT(),
        )
The code defines a Transcriber class, and then sets the initialization function to call that of the parent Agent class, setting the stt to be AssemblyAI and defining instructions as not needed since this agent will only transcribe speech.
Technically, this is all that's needed to define a Speech-to-Text agent, but we'll additionally define the on_user_turn_completed function, which defines what the agent should do when a users turn is completed. In other words, the AgentSession that we'll define below is what handles the Transcriber's output being sent to the room, but the on_user_turn_completed function is where you would define the backend logic of the agent, like logging, capturing metrics, or transcription analysis for something like content moderation. In this case, we'll simply log the transcript - add the following method to your :
    async def on_user_turn_completed(self, chat_ctx: llm.ChatContext, new_message: llm.ChatMessage):
        user_transcript = new_message.text_content
        logger.info(f" -> {user_transcript}")

        raise StopResponse()
The function logs the text_content of the message, which is the transcribed speech. Then a StopResponse() exception is raised to stop the Speech-to-Text -> LLM -> Text-to-Speech pipeline of the Agent, which has the effect of creating an agent which only transcribes speech (and does whatever you define in on_user_turn_completed) and does not partake in a conversational loop.
Now that we have defined the behavior of our agent, we need to make sure agents get added to the rooms for our app. When the agent program is run, it registers itself as a worker with the associated LiveKit server. When a room is started for your application, the LiveKit sends a job request to the worker, causing the worker to initiate a job. The job is initiated by an entrypoint function - we will define this function now. Add the following code to stt_agent.py:
async def entrypoint(ctx: JobContext):
    logger.info(f"starting transcriber (speech to text) example, room: {ctx.room.name}")
    await ctx.connect(auto_subscribe=AutoSubscribe.AUDIO_ONLY)

    session = AgentSession()

    await session.start(
        agent=Transcriber(),
        room=ctx.room,
        room_output_options=RoomOutputOptions(
            transcription_enabled=True,
            audio_enabled=False,
        ),
    )
When our program (worker) receives a job request, it first logs a message and then connects to the room, automatically subscribing to all audio tracks. It then creates an AgentSession, which orchestrates all of the input/output, components, and orchestration required to create an AI agent. We start the session, passing in an instance of our Transcriber agent, specifying the room to which the agent session is assigned/bound, and defining what streams are sent to the room by the agent. In this case, transcription is enabled, but audio is disabled since the agent will not be responding with speech. If you don't want transcriptions to be sent to the frontend (and you want to only do backend processing of the transcripts), you can set transcription_enabled=False.
Finally, we define the main loop of our agent, which uses the run_app method to run our program and register it as a worker with the LiveKit server associated with the variables in our .env file. Add the following code to your stt_agent.py file:
if __name__ == "__main__":
    cli.run_app(WorkerOptions(entrypoint_fnc=entrypoint))
Run the application
Go back to the Agents Playground in your browser, and click Connect. Remember, the Playground is connected to your LiveKit Project. Now, go into your terminal and start the agent with the below command, ensuring that the virtual environment you created earlier is active:
python stt_agent.py devThe agent connects to your LiveKit project by using the credentials in your .env file. In the Playground, you will see the Agent connected status change from FALSE to TRUE after starting your agent.
Begin speaking, and you will see your speech transcribed in real time. After you complete a sentence, it will be punctuated and formatted, and then a new line will be started for the next sentence in the chat box on the Playground.
In your terminal where the agent is running, you will see only the final punctuated/formatted utterances printed, because this is the behavior we defined in our stt_agent.py file.
That's it! You've successfully built a real-time Speech-to-Text agent for your LiveKit application. You can now use this agent to transcribe audio streams in real-time, and display the transcripts in your application's UI.
Remember, you can self-host any part of this application, including the LiveKit server, the frontend application. Check out the LiveKit docs for more information on building LiveKit applications and working with AI agents.
Final words
In this tutorial, we showed you how to add real-time Speech-to-Text to your LiveKit application using AssemblyAI's new Python LiveKit integration. We walked through the basics of LiveKit, how to set up a LiveKit server, how to build a real-time Speech-to-Text agent, and how to connect the agent to your LiveKit application.
Check out AssemblyAI's docs to learn more about other models we offer beyond Streaming Speech-to-Text. Otherwise, feel free to check out our YouTube channel or blog to learn more about building with AI and AI theory, like this video on the Model Context Protocol for AI agents:
Lorem ipsum dolor sit amet, consectetur adipiscing elit, sed do eiusmod tempor incididunt ut labore et dolore magna aliqua. Ut enim ad minim veniam, quis nostrud exercitation ullamco laboris nisi ut aliquip ex ea commodo consequat. Duis aute irure dolor in reprehenderit in voluptate velit esse cillum dolore eu fugiat nulla pariatur.
Related posts