Transcribe from an S3 Bucket
AssemblyAI’s Speech-to-Text APIs can be used with both local files and publicly accessible online files, but what if you want to transcribe an audio file that has restricted access? Luckily, you can do this with AssemblyAI too!
Read on to learn how you can transcribe an audio file stored in an AWS S3 bucket using AssemblyAI’s APIs.
Intro
In order to transcribe an audio file from an S3 bucket, AssemblyAI will need temporary access to the file. To provide this access, we’ll generate a presigned URL, which is simply a URL that has temporary access rights baked-in.
The overall process looks like this:
- Generate a presigned URL for the S3 audio file with boto.
- Pass this URL through to AssemblyAI’s API with a POST request.
- Wait until the transcription is complete, and then fetch it with a GET request.
Prerequisites
First, you’ll need an AssemblyAI account. You can sign up here for a free account if you don’t already have one.
Next, you’ll need to take note of your AssemblyAI API key, which you can find on your account dashboard after signing in. It will be on the left-hand side of the screen under Your API Key.
You’ll need the value of this key later, so leave the browser window open or copy the value into a text file.
AWS IAM User
Second, you’ll need an AWS IAM user with Programmatic access and the AmazonS3ReadOnlyAccess permission. If you already have such an IAM user and you know its public and private keys, then you can move on to the next section. Otherwise, create one now as follows:
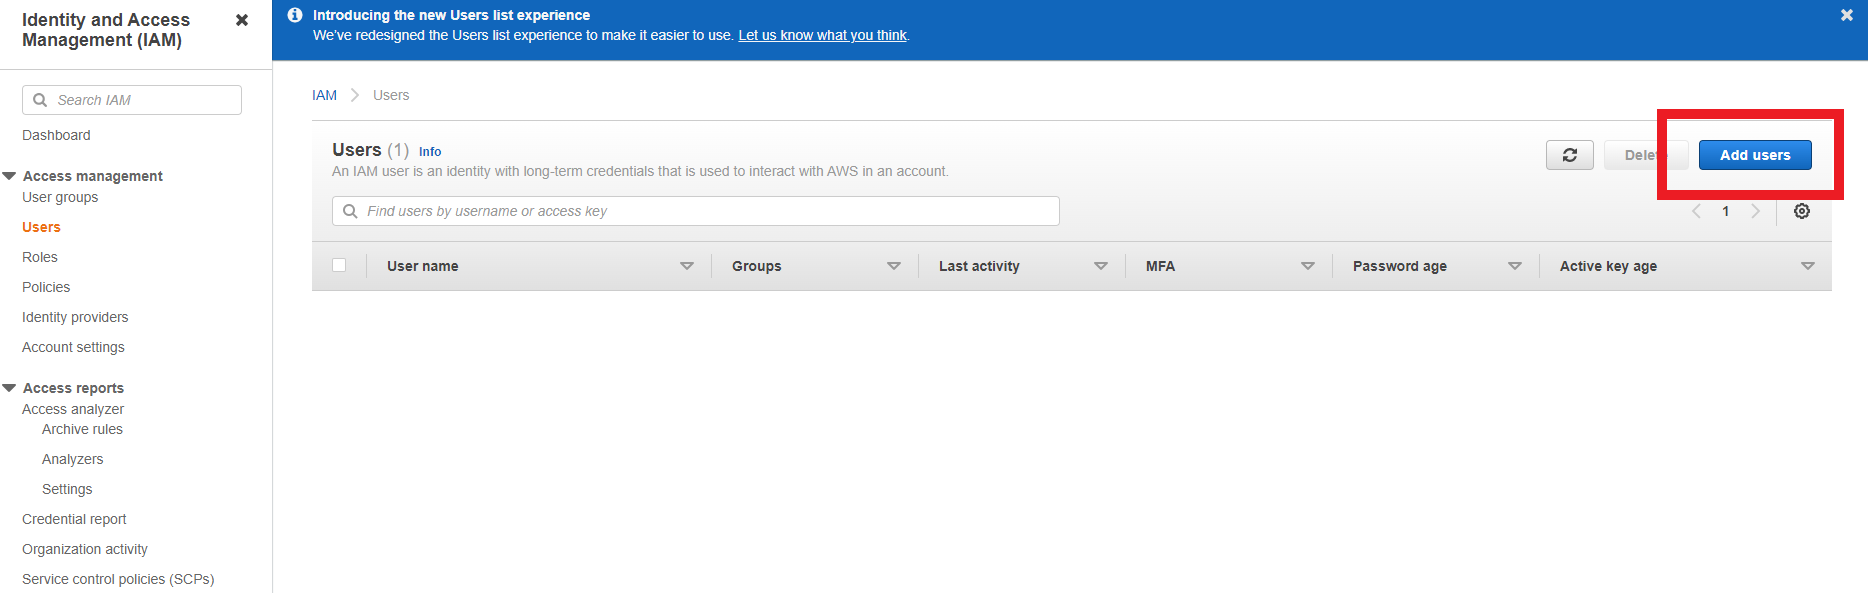
First, log into AWS as a root user or as another IAM user with the appropriate access, and then go to the IAM Management Console to add a new user.
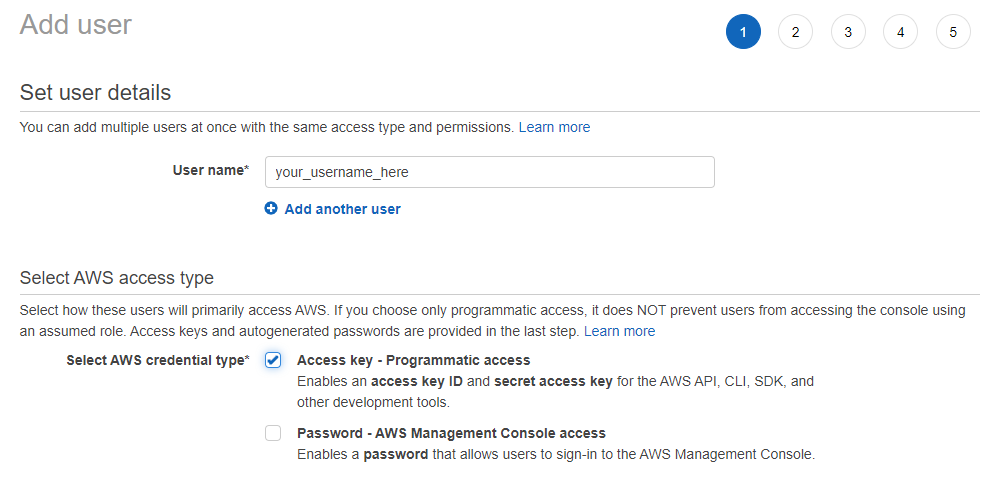
Set the user name you would like, and select Programmatic access under Select AWS access type:
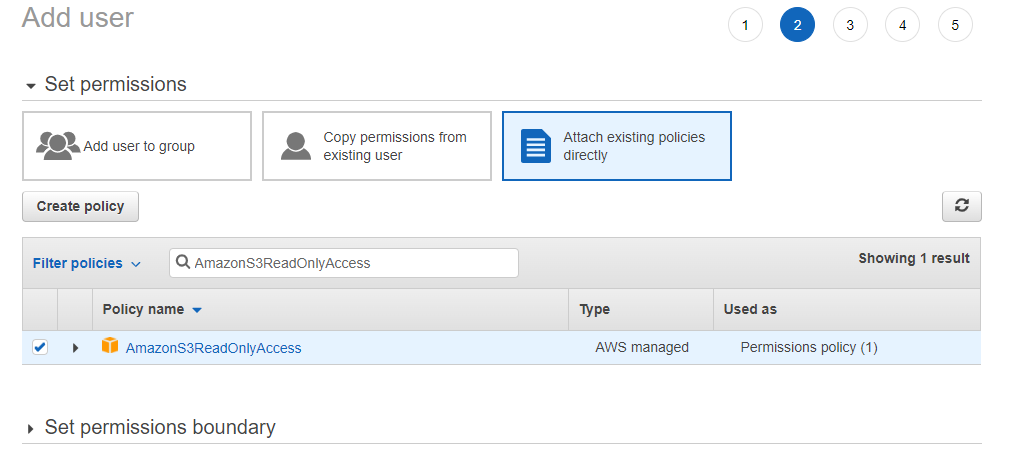
Click Next, and then Attach existing policies directly. Copy and paste AmazonS3ReadOnlyAccess into the Filter policies search box, and then add this permission by clicking on the checkbox next to it:
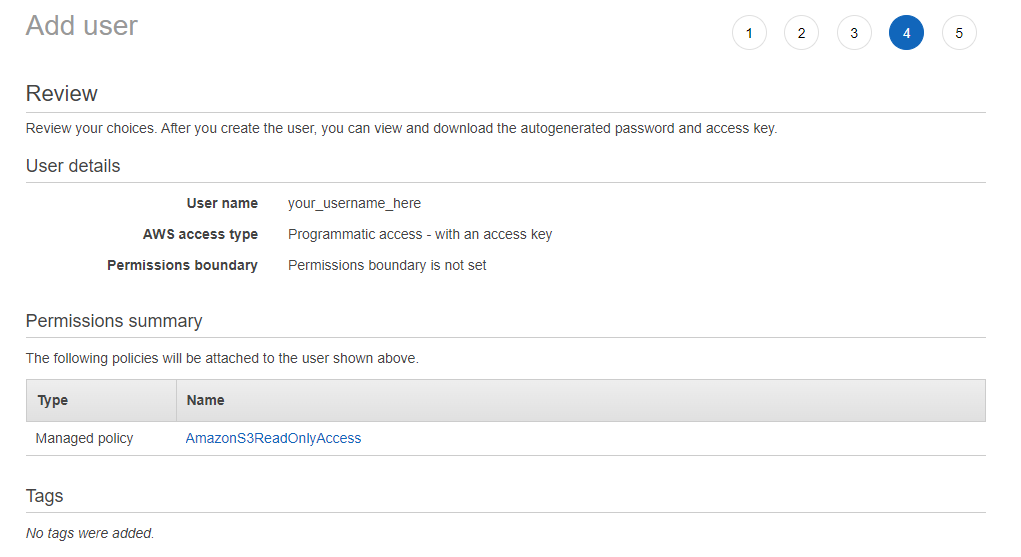
Click Next and add tags if you wish. Then click Next and review the IAM user profile to ensure that everything looks copacetic before clicking Create user.
Finally, take note of the IAM user’s Access key ID and Secret access key. Again, we will need these values later, so copy them into a text file before moving on.
Warning Make sure to copy the IAM user’s Secret access key and record it somewhere safe. Once you close the final window of the Add user sequence, you will not be able to access this key again and will need to regenerate it if you forget/lose the original.
Code
First, the necessary packages are installed.
Then we can import them and set our relevant variable values. You’ll need to edit these variables to be equivalent to the relevant values for your application:
bucket_name- The name of your AWS S3 bucket.object_name- The name of the audio file in the S3 bucket that you want to transcribe.iam_access_id- The access ID of the IAM user with programmatic access and S3 read permission.iam_secret_key- The secret key of the IAM user.assembly_key- Your AssemblyAI API key.
From here, we simply follow the sequence outlined in the introduction of this Colab:
- Generate a presigned URL for the S3 audio file with boto.
- Pass the presigned URL through to AssemblyAI’s API with a POST request.
- Wait until the transcription is complete, and then fetch it with a GET request.
