Create Multi-Lingual Subtitles with AssemblyAI and DeepL
Learn how to build a web app in Go that'll use AssemblyAI to transcribe an uploaded video file and generate subtitles.


With AssemblyAI, you can asynchronously transcribe a video and download the transcription as subtitles in either SRT or VTT format.
In this tutorial, you'll learn how to build a web app in Go that'll use AssemblyAI to transcribe an uploaded video file and generate subtitles. You'll then use DeepL to translate the subtitles into different languages.
Before you start
To complete this tutorial, you'll need:
- An upgraded AssemblyAI account
- A DeepL API account. This is different from a regular DeepL account. Make sure you register a DeepL API account.
- Go installed on your computer
Set up the application
You'll start by creating a web app where users can upload a video file.
First, create a directory for the project and navigate to the directory:
mkdir subtitle-video
cd subtitle-video
Initialize a Go module by running the following command, replacing <your-username> with your GitHub username:
go mod init <your-username>/aai-demo-goCreate a file named main.go where you'll write the code for the server. Start by importing the necessary modules:
package main

import (
    "fmt"
    "log"
    "net/http"

    "github.com/gin-gonic/gin"
    "github.com/google/uuid"
)
Here, you're using two external modules: Gin to simplify writing the server and uuid for generating unique identifiers.
Since you're using AssemblyAI to create transcriptions asynchronously, you'll need a way to keep track of the jobs submitted to AssemblyAI and the video file that was uploaded. For that, create the following type:
// The Job definition
type Job struct {
    ID string `json:"id"`
    FilePath string `json:"file_path"`
}

// Empty jobs array
var jobs []Job
Note: For simplicity, this app uses an in-memory array for storing the jobs. This means that you'll lose the jobs when you restart the server. This is fine for learning, but in a production app, you should use a database.
Write the main function, where you'll set up the gin.Router:
Here, you're using LoadHTMLGlob to load all HTML files from the views directory. This allows you to render the HTML files without having to write the full path every time. You're also using Gin to serve the uploads directory. This directory will store the uploaded videos, and serving the files from here lets you load the video in the browser.
func main() {
    r := gin.Default()
    r.Use(ErrorHandler)

    r.LoadHTMLGlob("views/*.html")
    r.Static("/uploads", "uploads")

    r.Run(":3000")
}
Finally, the server is started on port 3000.
Now it's time to define the routes. The first route is the home page. Paste the following code after the r.Static line:
r.GET("/", func(c *gin.Context) {
    c.HTML(http.StatusOK, "index.html", nil)
})
This route will simply render the views/index.html file.
The next route is the /upload route, which will handle the video upload:
r.POST("/upload", func(c *gin.Context) {
    file, _ := c.FormFile("myFile")
    log.Println(file.Filename)

    c.SaveUploadedFile(file, "uploads/" + file.Filename)

    ID := uuid.NewString()
    job := Job{ID: ID, FilePath: "uploads/" + file.Filename}
    jobs = append(jobs, job)

    fmt.Printf("File %s uploaded successfully with ID %s\n", file.Filename, ID)
    c.Redirect(http.StatusMovedPermanently, "/jobs/" + ID)
})
This route uses the SaveUploadedFile method to save the uploaded file in the uploads directory. It then creates a new Job with a randomly generated UUID. In the next section, you'll upload this file to AssemblyAI and replace this UUID with the ID generated by AssemblyAI.
After the upload completes, the user is redirected to the /jobs/:id route, which you'll write next:
r.GET("/jobs/:id", func(c *gin.Context) {
    ID := c.Param("id")
    var job Job
    for _, j := range jobs {
        if j.ID == ID {
            job = j
        }
    }
    c.HTML(http.StatusOK, "job.html", gin.H{
        "job": job,
    })
})
This route loads the Job using the id parameter. It then renders views/job.html and passes the Job to it.
Lastly, define the ErrorHandler function that'll handle any error that might occur in the routes:
func ErrorHandler(c *gin.Context) {
    c.Next()

    if(len(c.Errors) == 0) {
     return
    }

    for _, err := range c.Errors {
     log.Printf("Error: %s\n", err.Error())
    }

    c.JSON(http.StatusInternalServerError, "")
}
The entire main.go file should look like this:
package main

import (
    "fmt"
    "log"
    "net/http"

    "github.com/gin-gonic/gin"
    "github.com/google/uuid"
)

// The Job definition
type Job struct {
    ID string `json:"id"`
    FilePath string `json:"file_path"`
}

// Empty jobs array
var jobs []Job

func main() {
    r := gin.Default()
    r.Use(ErrorHandler)

    r.LoadHTMLGlob("views/*.html")
    r.Static("/uploads", "uploads")

    r.GET("/", func(c *gin.Context) {
        c.HTML(http.StatusOK, "index.html", nil)
    })

    r.POST("/upload", func(c *gin.Context) {
     file, _ := c.FormFile("myFile")
     log.Println(file.Filename)

     c.SaveUploadedFile(file, "uploads/" + file.Filename)

     ID := uuid.NewString()
     job := Job{ID: ID, FilePath: "uploads/" + file.Filename}
     jobs = append(jobs, job)

     fmt.Printf("File %s uploaded successfully with ID %s\n", file.Filename, ID)
     c.Redirect(http.StatusMovedPermanently, "/jobs/" + ID)
    })

    r.GET("/jobs/:id", func(c *gin.Context) {
     ID := c.Param("id")
     var job Job
     for _, j := range jobs {
         if j.ID == ID {
             job = j
         }
     }
     c.HTML(http.StatusOK, "job.html", gin.H{
         "job": job,
     })
    })

    r.Run(":3000")
}

func ErrorHandler(c *gin.Context) {
    c.Next()

    if(len(c.Errors) == 0) {
     return
    }

    for _, err := range c.Errors {
     log.Printf("Error: %s\n", err.Error())
    }

    c.JSON(http.StatusInternalServerError, "")
}
Create the upload form
Now, create a new file at views/index.html with the following code:
<!DOCTYPE html>
<html lang="en">
  <head>
    <meta charset="UTF-8" />
    <meta name="viewport" content="width=device-width, initial-scale=1.0" />
    <meta http-equiv="X-UA-Compatible" content="ie=edge" />
    <link
      href="https://fonts.googleapis.com/css?family=Roboto:300,400,500,700,900&display=swap"
      rel="stylesheet"
    />
    <link
      rel="stylesheet"
      href="https://cdn.jsdelivr.net/npm/tw-elements/dist/css/tw-elements.min.css"
    />
    <script src="https://cdn.tailwindcss.com"></script>
    <script>
      tailwind.config = {
        darkMode: "class",
        theme: {
          fontFamily: {
            sans: ["Roboto", "sans-serif"],
            body: ["Roboto", "sans-serif"],
            mono: ["ui-monospace", "monospace"],
          },
        },
        corePlugins: {
          preflight: false,
        },
      };
    </script>
    <title>AssemblyAI Demo</title>
  </head>
  <body class="flex items-center justify-center h-screen">
    <form
      enctype="multipart/form-data"
      action="/upload"
      method="post"
      onsubmit="upload.disabled = true; upload.innerText = 'Uploading'; upload.classList.replace('bg-primary', 'bg-gray-300'); return true;"
    >
      <div class="mb-3">
        <label
          for="myFile"
          class="mb-2 inline-block text-neutral-500 dark:text-neutral-400"
          >Upload a video file</label
        >
        <input
          class="relative m-0 block w-full min-w-0 flex-auto cursor-pointer rounded border border-solid border-secondary-500 bg-transparent bg-clip-padding px-3 py-[0.32rem] text-base font-normal text-surface transition duration-300 ease-in-out file:-mx-3 file:-my-[0.32rem] file:me-3 file:cursor-pointer file:overflow-hidden file:rounded-none file:border-0 file:border-e file:border-solid file:border-inherit file:bg-transparent file:px-3  file:py-[0.32rem] file:text-surface focus:border-primary focus:text-gray-700 focus:shadow-inset focus:outline-none dark:border-white/70 dark:text-white  file:dark:text-white"
          type="file"
          id="myFile"
          name="myFile"
          accept="video/*"
        />
        <button
          type="submit"
          name="”upload”"
          class="inline-block rounded bg-primary px-6 pb-2 pt-2.5 m-5 text-xs font-medium uppercase leading-normal text-white shadow-primary-3 transition duration-150 ease-in-out hover:bg-primary-accent-300 hover:shadow-primary-2 focus:bg-primary-accent-300 focus:shadow-primary-2 focus:outline-none focus:ring-0 active:bg-primary-600 active:shadow-primary-2 motion-reduce:transition-none dark:shadow-black/30 dark:hover:shadow-dark-strong dark:focus:shadow-dark-strong dark:active:shadow-dark-strong"
        >
          Upload File
        </button>
      </div>
    </form>
  </body>
</html>
This file simply displays a file chooser and lets the user upload a video file. Tailwind CSS is used to style the page to make it look more presentable.
Transcribe the video using AssemblyAI
Log in to the AssemblyAI dashboard and copy the API key. Create a .env file at the root of your project and add the AssemblyAI API key:
ASSEMBLYAI_API_KEY=<YOUR_API_KEY>
In main.go, add the new imports:
import (
    ...
    "context"
    "os"

    "github.com/AssemblyAI/assemblyai-go-sdk"
    "github.com/joho/godotenv"
)
You'll be using GoDotEnv to load the environment variables from the .env file and the AssemblyAI Go SDK to communicate with the AssemblyAI server.
In the main function, add the following code before the existing code:
err := godotenv.Load()
if err != nil {
    log.Fatal("Error loading .env file")
}

aaiApiKey := os.Getenv("ASSEMBLYAI_API_KEY")

client := assemblyai.NewClient(aaiApiKey)
This code loads the environment variable and constructs an AssemblyAI client.
Replace the /upload route with the following code:
r.POST("/upload", func(c *gin.Context) {

    file, _ := c.FormFile("myFile")
    log.Println(file.Filename)

    c.SaveUploadedFile(file, "uploads/" + file.Filename)

    ctx := context.Background()
    f, err := os.Open("uploads/" + file.Filename)
    if err != nil {
        c.AbortWithError(http.StatusInternalServerError, err)
        return
    }
    defer f.Close()

    transcript, err := client.Transcripts.SubmitFromReader(ctx, f, nil)
    if err != nil {
        c.AbortWithError(http.StatusInternalServerError, err)
        return
    }

    ID := *transcript.ID
    job := Job{ID: ID, FilePath: "uploads/" + file.Filename}
    jobs = append(jobs, job)

    fmt.Printf("File %s uploaded successfully with ID %s\n", file.Filename, ID)
    c.Redirect(http.StatusMovedPermanently, "/jobs/" + ID)
})
This code is similar to the previous version, except this time, you're uploading the file to AssemblyAI for transcription. The client.Transcripts.SubmitFromReader function lets you submit a file to AssemblyAI without waiting for transcription to finish. It returns metadata about the submitted transcription, from which the ID is used to set the ID of the Job. You can now remove the import for the uuid module, as you don't need it anymore.
Create a new route, /jobs/:id/status:
r.GET("/jobs/:id/status", func(c *gin.Context) {
    ID := c.Param("id")
    var job Job
    for _, j := range jobs {
        if j.ID == ID {
            job = j
        }
    }

    ctx := context.Background()
    transcript, err := client.Transcripts.Get(ctx, id)
    if err != nil {
        c.AbortWithError(http.StatusInternalServerError, err)
        return
    }

    if transcript.Status == "processing" || transcript.Status == "queued" {
        c.JSON(http.StatusOK, gin.H{
            "status": "loading",
            "job": job,
        })
    } else if transcript.Status == "completed" {
        subtitles, err := client.Transcripts.GetSubtitles(ctx, ID, "vtt", nil)
        if err != nil {
            c.AbortWithError(http.StatusInternalServerError, err)
            return
        }
        c.JSON(http.StatusOK, gin.H{
            "status":   "completed",
            "job":      job,
            "subtitles": string(subtitles),
        })
    }
})
This route, when invoked, will check the status of the transcription using its ID with the client.Transcripts.Get function. If the status is processing or queued, a response will be sent to the frontend with status set to loading. If the transcription status is completed, the client.Transcripts.GetSubtitles function is used to download the transcription as subtitles in the WebVTT format. This subtitle is then sent to the frontend.
The frontend will periodically poll this route to determine when the transcription is complete.
Open views/job.html and add the following code before the closing body tag:
<div id="video"></div>
<script>
  c = setInterval(() => {
    fetch("/jobs/{{ .job.ID }}/status")
      .then((res) => res.json())
      .then((data) => {
        if (data.status === "completed") {
          const { subtitles } = data;
          const { file_path } = data.job;

          const video = document.createElement("video");
          video.src = "/" + file_path;
          video.controls = true;
          video.autoplay = false;
          video.loop = true;
          video.width = 500;
          video.style = "border-radius: 10px;";

          let loading = document.getElementById("loading");
          document.body.removeChild(loading);
          document.getElementById("video").appendChild(video);

          createSubtitles(subtitles, "en");
          clearInterval(c);
        }
      });
  }, 3000);

  function createSubtitles(subtitles, srclang) {
    const blob = new Blob([subtitles], { type: "text/vtt" });
    const url = URL.createObjectURL(blob);

    const video = document.querySelector("video");
    for (let i = 0; i < video.textTracks.length; i++) {
      video.textTracks[i].mode = "hidden";
    }

    const track = document.createElement("track");
    track.src = url;
    track.kind = "subtitles";
    track.label = srclang;
    track.srclang = srclang;
    track.mode = "showing";
    video.appendChild(track);
  }
</script>
This code adds two JavaScript functions. The first is a setInterval call that polls the /jobs/:id/status route every three seconds. If the returned status is completed, it creates a new video element and adds it to the body. The src attribute of the video is set to the FilePath attribute of the Job, which lets the browser load the video file from the uploads directory.
The createSubtitles function takes the subtitles and the language. It creates a Blob from the subtitles and creates a new track element to display the subtitles. This track element is added to the video element, and any other existing tracks are set to be hidden.
Stop the server if it's running and restart it with go get . && go run . . Go to http://localhost:3000 again and upload the video file. This time, after a little while, the video will appear. You can click the CC button to turn on the English captions.
Note: To keep things simple, this tutorial assumes that the uploaded video is in English. However, AssemblyAI supports over sixteen languages for transcription.
Translate subtitles using DeepL
Log in to the DeepL API dashboard and copy the API key.
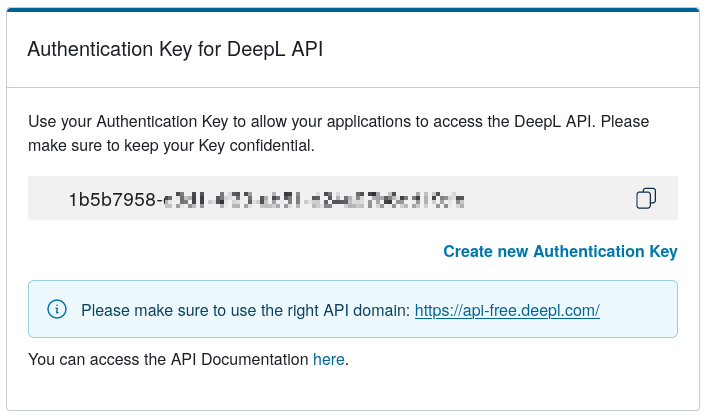
Add the DeepL API key in the .env file:
DEEPL_API_KEY=<YOUR_API_KEY>To convert the responses from DeepL into JSON, you'll need to define a couple of types. Paste the following code after the definition of the Job type:
type Translation struct{
    Text string `json:"text"`
    DetectedSourceLanguage string `json:"detected_source_language"`
}

type TranslationResponse struct{
    Translations []Translation `json:"translations"`
}
Add the new imports:
import (
    ...
    "encoding/json"
    "io"
    "bytes"
)
Add a new /translate route:
r.POST("/translate", func(c *gin.Context) {
    ID := c.PostForm("job_id")
    language := c.PostForm("language")

    ctx := context.Background()
    subtitles, err := client.Transcripts.GetSubtitles(ctx, ID, "vtt", nil)
    if err != nil {
        c.AbortWithError(http.StatusInternalServerError, err)
        return
    }

    deepLApiKey := os.Getenv("DEEPL_API_KEY")
    body, _ := json.Marshal(map[string]any{
        "text": []string{string(subtitles)},
        "target_lang": language,
    })
    req, err := http.NewRequest("POST", "https://api-free.deepl.com/v2/translate", bytes.NewBuffer(body))
    if err != nil {
        c.AbortWithError(http.StatusInternalServerError, err)
        return
    }
    req.Header.Set("Content-Type", "application/json")
    req.Header.Set("Authorization", "DeepL-Auth-Key " + deepLApiKey)

    resp, err := http.DefaultClient.Do(req)
    if err != nil {
        c.AbortWithError(http.StatusInternalServerError, err)
        return
    }
    defer resp.Body.Close()

    respBody, err := io.ReadAll(resp.Body)
    if err != nil {
        c.AbortWithError(http.StatusInternalServerError, err)
        return
    }

    var translationResponse TranslationResponse
    err = json.Unmarshal(respBody, &translationResponse)
    if err != nil {
        c.AbortWithError(http.StatusInternalServerError, err)
        return
    }
    c.JSON(http.StatusOK, translationResponse)
})
This route will be invoked with the transcript ID and the target language. First, the subtitles are downloaded from AssemblyAI using a similar code from the previous section. Then, the DeepL API is called by making a request to https://api-free.deepl.com/v2/translate, and the returned translations are sent to the frontend.
Open the views/job.html file and add a select element to show the list of languages:
<div id="language" class="m-5">
  <select
    id="language-select"
    class="bg-gray-50 border border-gray-300 text-gray-900 text-sm rounded-lg focus:ring-blue-500 focus:border-blue-500 block w-full p-2.5 dark:bg-gray-700 dark:border-gray-600 dark:placeholder-gray-400 dark:text-white dark:focus:ring-blue-500 dark:focus:border-blue-500"
  >
    <option value="NONE" selected>Choose a language</option>
    <option value="ES">Spanish</option>
    <option value="FR">French</option>
    <option value="DE">German</option>
    <!-- Add more options as needed -->
  </select>
</div>
You can find a list of languages supported by DeepL here.
Inside the script tag, add the following code before all other existing code:
document.getElementById("language").style.display = "none";This code will hide the language selector when the page loads.
Inside the setInterval call, add the following code after the createSubtitles call:
document.getElementById("language").style.display = "block";This brings back the language selector when the video is done loading.
Add an event listener to the language selector, which will call the /translate route:
document
  .getElementById("language-select")
  .addEventListener("change", function () {
    const selectedLanguage = this.value;
    if (selectedLanguage === "NONE") {
      return;
    }
    document.querySelector("video").pause();

    const notice = document.createElement("span");
    notice.innerHTML = "Translating...";
    document.getElementById("video").appendChild(notice);

    const formData = new FormData();
    formData.append("language", selectedLanguage);
    formData.append("job_id", "{{ .job.ID }}");
    fetch("/translate", {
      method: "POST",
      body: formData,
    })
      .then((response) => response.json())
      .then((data) =>
        createSubtitles(
          data.translations[0].text,
          selectedLanguage.toLowerCase()
        )
      )
      .catch((error) => {
        console.error("Error:", error);
      });
  });
Apart from calling the /translate route, this code also displays a message saying "Translating..." so that the user knows it's working. Once the translated subtitles are available, the createSubtitles function is called to add the translated subtitles.
Modify the createSubtitles function to remove the "Translating..." notice if the target language is anything except English. Add this to the bottom of the function:
if (srclang === "en") {
  return;
}
document.querySelector("#video span").remove();
alert("Translations added");
This is how the file should look now:
<!DOCTYPE html>
<html lang="en">
  <head>
    <meta charset="UTF-8" />
    <meta name="viewport" content="width=device-width, initial-scale=1.0" />
    <meta http-equiv="X-UA-Compatible" content="ie=edge" />
    <link
      href="https://fonts.googleapis.com/css?family=Roboto:300,400,500,700,900&display=swap"
      rel="stylesheet"
    />
    <link
      rel="stylesheet"
      href="https://cdn.jsdelivr.net/npm/tw-elements/dist/css/tw-elements.min.css"
    />
    <script src="https://cdn.tailwindcss.com"></script>
    <script>
      tailwind.config = {
        darkMode: "class",
        theme: {
          fontFamily: {
            sans: ["Roboto", "sans-serif"],
            body: ["Roboto", "sans-serif"],
            mono: ["ui-monospace", "monospace"],
          },
        },
        corePlugins: {
          preflight: false,
        },
      };
    </script>
    <title>Video Playback</title>
  </head>
  <body class="flex flex-col items-center justify-center h-screen">
    <span id="loading">Processing {{ .job.FilePath }} (Job {{ .job.ID }})</span>
    <div id="video"></div>
    <div id="language" class="m-5">
      <select
        id="language-select"
        class="bg-gray-50 border border-gray-300 text-gray-900 text-sm rounded-lg focus:ring-blue-500 focus:border-blue-500 block w-full p-2.5 dark:bg-gray-700 dark:border-gray-600 dark:placeholder-gray-400 dark:text-white dark:focus:ring-blue-500 dark:focus:border-blue-500"
      >
        <option value="NONE" selected>Choose a language</option>
        <option value="ES">Spanish</option>
        <option value="FR">French</option>
        <option value="DE">German</option>
        <!-- Add more options as needed -->
      </select>
    </div>
    <script>
      document.getElementById("language").style.display = "none";
      c = setInterval(() => {
        fetch("/jobs/{{ .job.ID }}/status")
          .then((res) => res.json())
          .then((data) => {
            if (data.status === "completed") {
              const { subtitles } = data;
              const { file_path } = data.job;

              const video = document.createElement("video");
              video.src = "/" + file_path;
              video.controls = true;
              video.autoplay = false;
              video.loop = true;
              video.width = 500;
              video.style = "border-radius: 10px;";

              let loading = document.getElementById("loading");
              document.body.removeChild(loading);
              document.getElementById("video").appendChild(video);

              createSubtitles(subtitles, "en");
              document.getElementById("language").style.display = "block";
              clearInterval(c);
            }
          });
      }, 3000);

      document
        .getElementById("language-select")
        .addEventListener("change", function () {
          const selectedLanguage = this.value;
          if (selectedLanguage === "NONE") {
            return;
          }
          document.querySelector("video").pause();

          const notice = document.createElement("span");
          notice.innerHTML = "Translating...";
          document.getElementById("video").appendChild(notice);

          const formData = new FormData();
          formData.append("language", selectedLanguage);
          formData.append("job_id", "{{ .job.ID }}");
          fetch("/translate", {
            method: "POST",
            body: formData,
          })
            .then((response) => response.json())
            .then((data) =>
              createSubtitles(
                data.translations[0].text,
                selectedLanguage.toLowerCase()
              )
            )
            .catch((error) => {
              console.error("Error:", error);
            });
        });

      function createSubtitles(subtitles, srclang) {
        const blob = new Blob([subtitles], { type: "text/vtt" });
        const url = URL.createObjectURL(blob);

        const video = document.querySelector("video");
        for (let i = 0; i < video.textTracks.length; i++) {
          video.textTracks[i].mode = "hidden";
        }

        const track = document.createElement("track");
        track.src = url;
        track.kind = "subtitles";
        track.label = srclang;
        track.srclang = srclang;
        track.mode = "showing";
        video.appendChild(track);

        if (srclang === "en") {
          return;
        }
        document.querySelector("#video span").remove();
        alert("Translations added");
      }
    </script>
  </body>
</html>
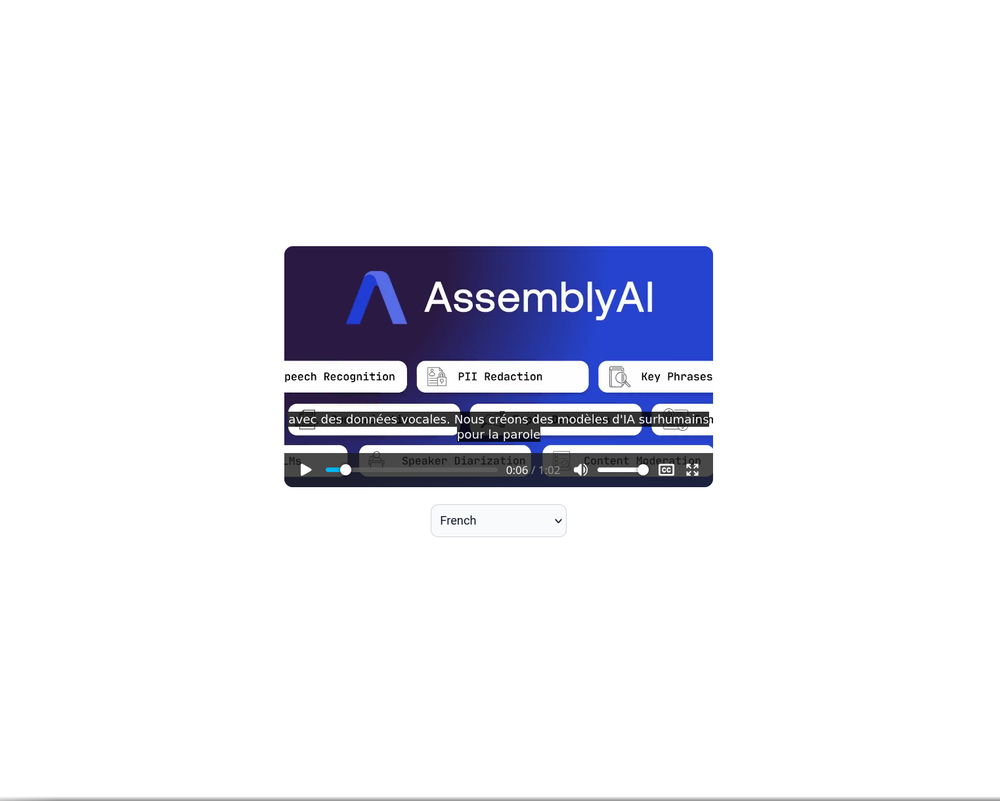
Restart the server and go through the entire process of uploading the video again. When the video loads, you'll see the language selector:

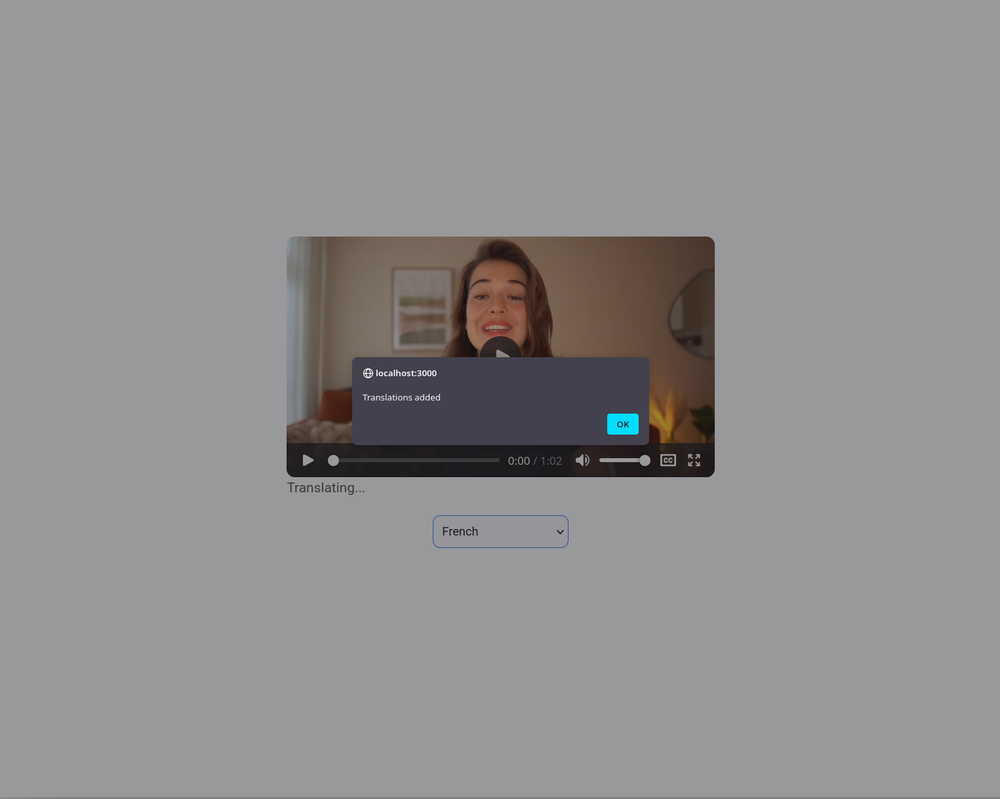
Selecting a language will trigger the translation, and you'll get an alert when the translation is done:
The new language will be added to the closed captions menu:
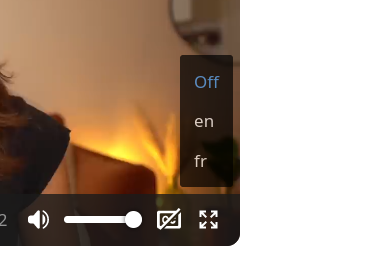
You can now select the newly added subtitles and enjoy the translation.
Note: In DeepL's free plan, the text must be 128 KB or less in size, or it will need to be broken up into multiple texts. So, you'll need to upload videos that aren't too long.
You can find the full code on GitHub.
Conclusion
In this article, you learned how AssemblyAI can be used to transcribe a video and generate subtitles. You then used DeepL to translate the subtitles to different languages on demand.
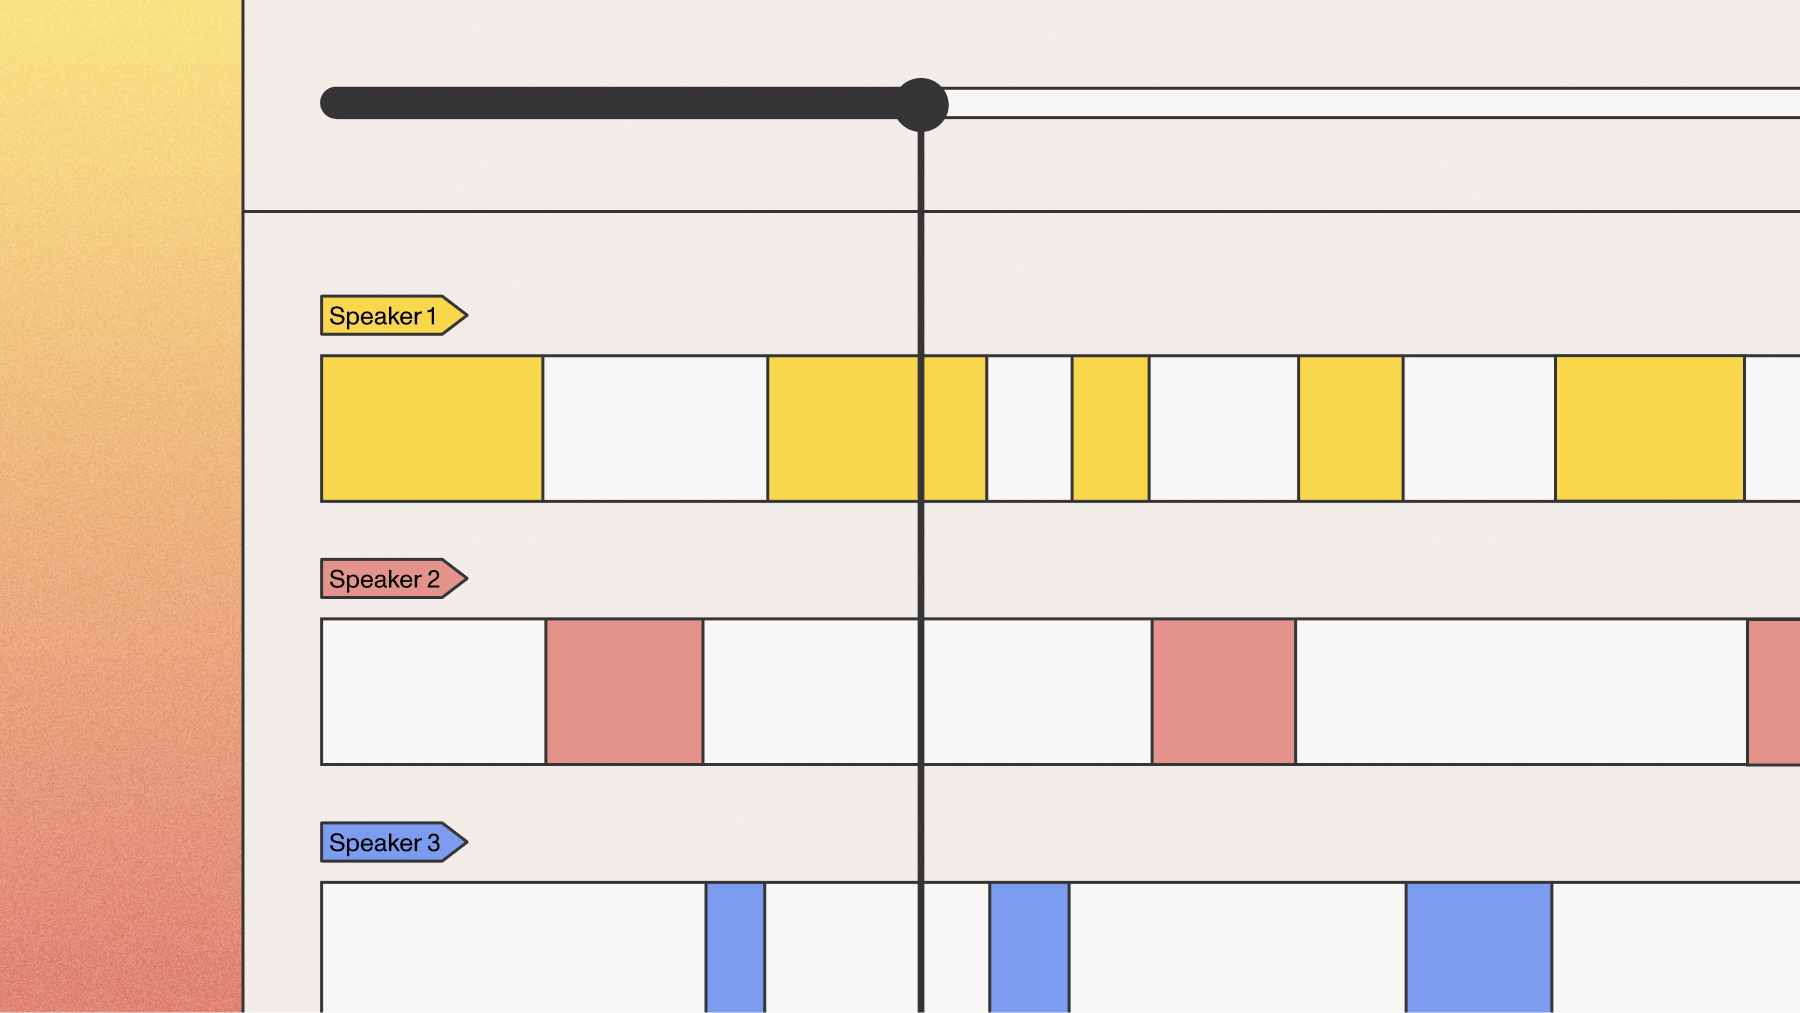
AssemblyAI can do much more than generate subtitles. Features like speaker diarization, profanity filtering, custom spelling, and custom vocabulary make AssemblyAI a versatile tool for all your transcription needs.Subtitles are vital for enhancing the accessibility of an application. Users who have difficulty understanding the language of a video rely on subtitles to help them understand and grasp the contents of the video. Typically, creating subtitles for videos requires tedious manual work to carefully transcribe each and every word while also keeping track of the timeline. But with AssemblyAI's audio transcription feature, you can generate subtitles for a video in minutes.
Lorem ipsum dolor sit amet, consectetur adipiscing elit, sed do eiusmod tempor incididunt ut labore et dolore magna aliqua. Ut enim ad minim veniam, quis nostrud exercitation ullamco laboris nisi ut aliquip ex ea commodo consequat. Duis aute irure dolor in reprehenderit in voluptate velit esse cillum dolore eu fugiat nulla pariatur.
Related posts


.png)