Transcribing Local Audio Files with Node.js
In this blog, we look at how to transcribe audio and video files in Node.js using AssemblyAI.


In a previous blog, we covered how to build a simple command-line app that transcribes an audio file using the AssemblyAI speech-to-text API, Node.js and JavaScript. That blog used an audio URL. But what if you want to upload an audio file directly from your computer or device?
AssemblyAI has got you covered!

In this post, we will expand upon the app we created in the previous blog by introducing file-upload functionality.
Prerequisites
- A free AssemblyAI account
- A code editor such as VS Code
- Node.js and npm
- A copy or clone of this GitHub repository
If you would like to see the completed code project, it is available at this GitHub repository.
Setting up the cloned repository
If you haven’t already completed the tutorial in the previous blog, it may be a good idea to follow the steps in that article, even if you just intend to use the completed code in the GitHub repository.
We will need to navigate to the directory containing our node application.
cd transcribe
Create a new file inside of the transcribe directory:
If using Windows:
New-Item uploadFile.js
Alternatively, if using macOS or Linux:
touch uploadFile.js
If you haven’t already added your AssemblyAI API key to the “.env” file then do so now. You can find your API key in the AssemblyAI dashboard and add it as the value to the variable, as below:
ASSEMBLYAI_API_KEY = "YOUR_API_KEY"
You are now ready to write the uploadFile function.
Uploading a local audio file to AssemblyAI
When we upload a file to AssemblyAI we need to send it as chunked data. This is a method of transfer encoding used in HTTP.
AssemblyAI will then save the audio file to private storage, creating a URL that’s only accessible via the AssemblyAI API. All uploads are immediately deleted after transcription as we do not store uploads.
The response to our HTTP request will then include the URL to this stored audio file.
Let’s get to it!
Open the uploadFile.js that we created earlier in your code editor. Copy and paste the following code into this file:
require('dotenv').config(); const fetch = require('node-fetch'); const fs = require('fs'); const url = 'https://api.assemblyai.com/v2/upload';
The above code will import the Node.js libraries that we will be using. We also set the url to be the value of the AssemblyAI upload API endpoint.
The Node.js fs (file stream) library is included in the Node standard library and we will use this to create a file stream of the local audio file ready to send as chunked data to AssemblyAI.
Just as we did in the app that we made in the previous article, we will be passing an argument on the command-line. This time it will be the file path to our audio file.
let args = process.argv.slice(2); let audioPath = args[0];
Next, we will use the readFile method, included in the fs module, to convert the audio file into a stream. This method expects the path to the file and a function.
fs.readFile(audioPath, (err, data) => { if (err) { return console.log(err); } }
The code above uses an arrow function to process the file stream. In the event of an error, the function will log the error to the command line.
Now that we have our file in memory as the value of data, we can go ahead and make the HTTP POST request to AssemblyAI.
As in the previous post, we will use fetch to make the request. Fetch expects some parameters and the code below defines them. Add this code inside the fs arrow function.
fs.readFile(audioPath, (err, data) => { if (err) { return console.log(err); } } // add the code below to the arrow function const params = { headers: { "authorization": process.env.ASSEMBLYAI_API_KEY, "Transfer-Encoding" : "chunked" }, body: data, method: 'POST' };
We are adding an AssemblyAI API key, retrieved from the .env file to the headers along with the important Transfer-Encoding setting of chunked.
The body of the request is the file stream data.
The final step is to make the actual HTTP Post request and print the resulting upload_url to the command line!
fs.readFile(audioPath, (err, data) => { if (err) { return console.log(err); } const params = { headers: { "authorization": process.env.ASSEMBLYAI_API_KEY, "Transfer-Encoding" : "chunked" }, body: data, method: 'POST' }; // add the code below to the arrow function fetch(url, params) .then(response => response.json()) .then(data => { console.log(`URL: ${data['upload_url']}`) }) .catch((error) => { console.error(`Error: ${error}`); }); }
We also handle any errors that occur during the HTTP request.
The entire code should look like this:
require('dotenv').config(); const fetch = require('node-fetch'); const fs = require('fs'); const url = 'https://api.assemblyai.com/v2/upload'; let args = process.argv.slice(2); let audioPath = args[0]; fs.readFile(audioPath, (err, data) => { if (err) { return console.log(err); } const params = { headers: { "authorization": process.env.ASSEMBLYAI_API_KEY, "Transfer-Encoding": "chunked" }, body: data, method: 'POST' }; fetch(url, params) .then(response => response.json()) .then(data => { console.log(`URL: ${data['upload_url']}`) }) .catch((error) => { console.error(`Error: ${error}`); }); });
Time to try it out!
Our application now has the ability to upload an audio file either from the local file system or from a resource hosted on the Internet. Better still, we can do the whole process from the command line.
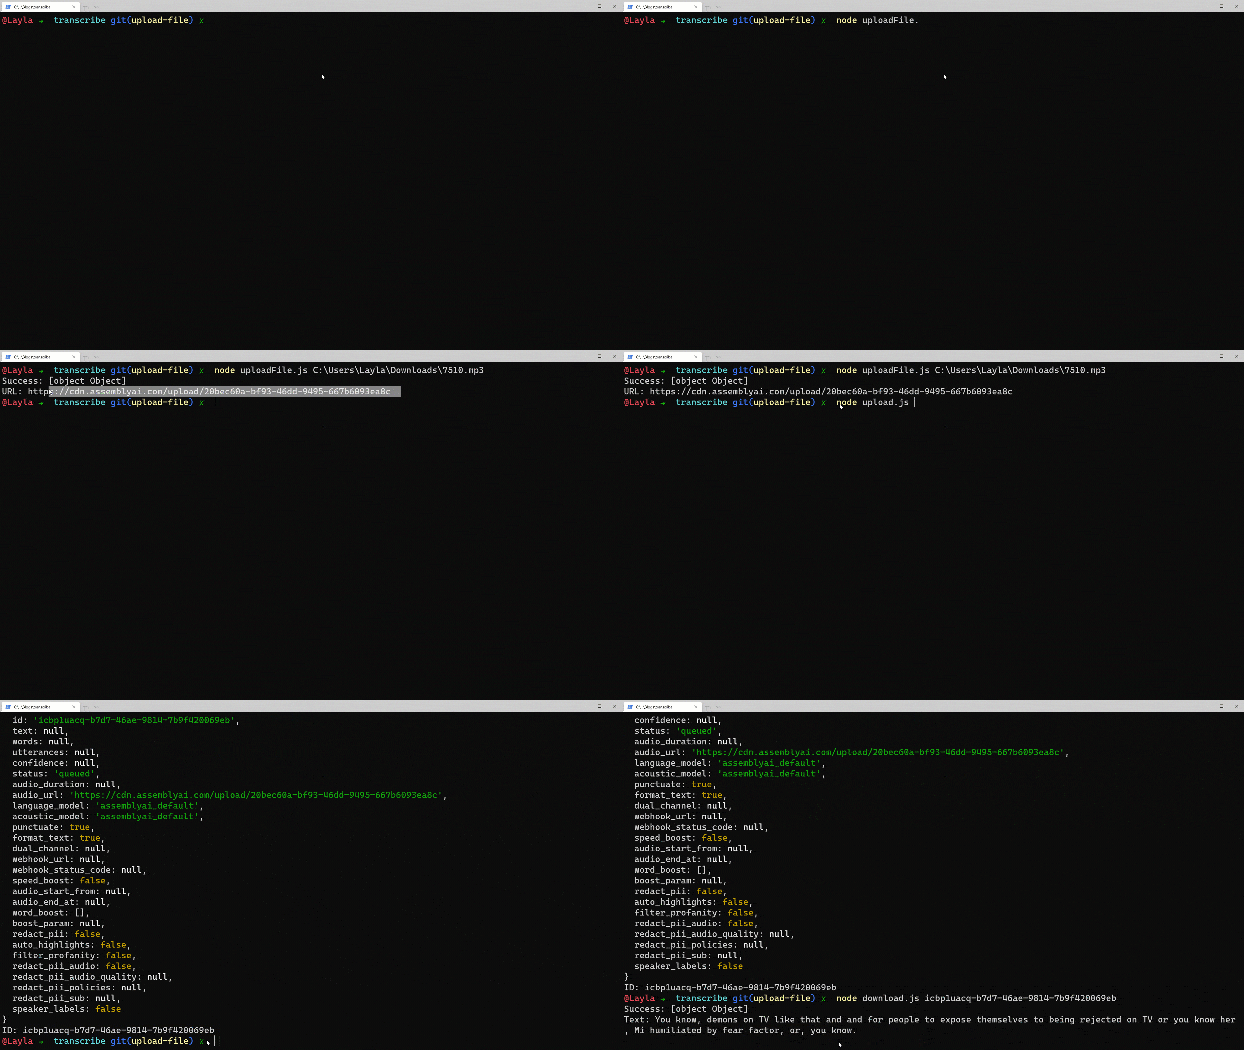
The first step is to upload the file. Make sure that the current directory is transcribe, or wherever your code resides, and enter the following command:
node uploadFile.js C:\Path\To\Audio\File.mp3
Make sure you update the above code with a path to the audio clip on your computer. If you need an example audio clip to test with, feel free to download this one.
If you don’t have any errors you should see the upload_url printed to the command line.
Now you can copy this URL and pass it into the next stage of the application, using the code written in the previous blog post.
node upload.js RETURNED_UPLOAD_URL
This command should print the transcription ID to the screen. Copy the ID and enter the final command of the application.
node download.js TRANSCRIPTION_ID
If your transcription is ready, your text will be printed to the command line!
What now?
In this post, we successfully learned how to upload a file as a binary object to the AssemblyAI upload API using fs.
If you haven’t already tried the challenge in the previous post, that could be a fun next step.
Let us know how you get on or if you have any questions about the topics covered in this blog post or AssemblyAI in general!
Lorem ipsum dolor sit amet, consectetur adipiscing elit, sed do eiusmod tempor incididunt ut labore et dolore magna aliqua. Ut enim ad minim veniam, quis nostrud exercitation ullamco laboris nisi ut aliquip ex ea commodo consequat. Duis aute irure dolor in reprehenderit in voluptate velit esse cillum dolore eu fugiat nulla pariatur.


