

Get Started
Before we begin, make sure you have:- An AssemblyAI account and an API key. You can sign up for a free account and get your API key from your dashboard.
- An AWS account.
- An Amazon Connect instance.
Step-by-Step Instructions
1
In the AWS console, navigate to the Amazon Connect services page. Select your instance and then click into the Data Storage section. On this page, find the subsection named Call Recordings and note the S3 bucket path where your call recordings are stored, you’ll need this for later.
2
Navigate to the Lambda services page, and create a new function. Set the runtime to Python 3.13. In the Change default execution role section, choose the option to create a new role with basic Lambda permissions. Assign a function name and then click Create function.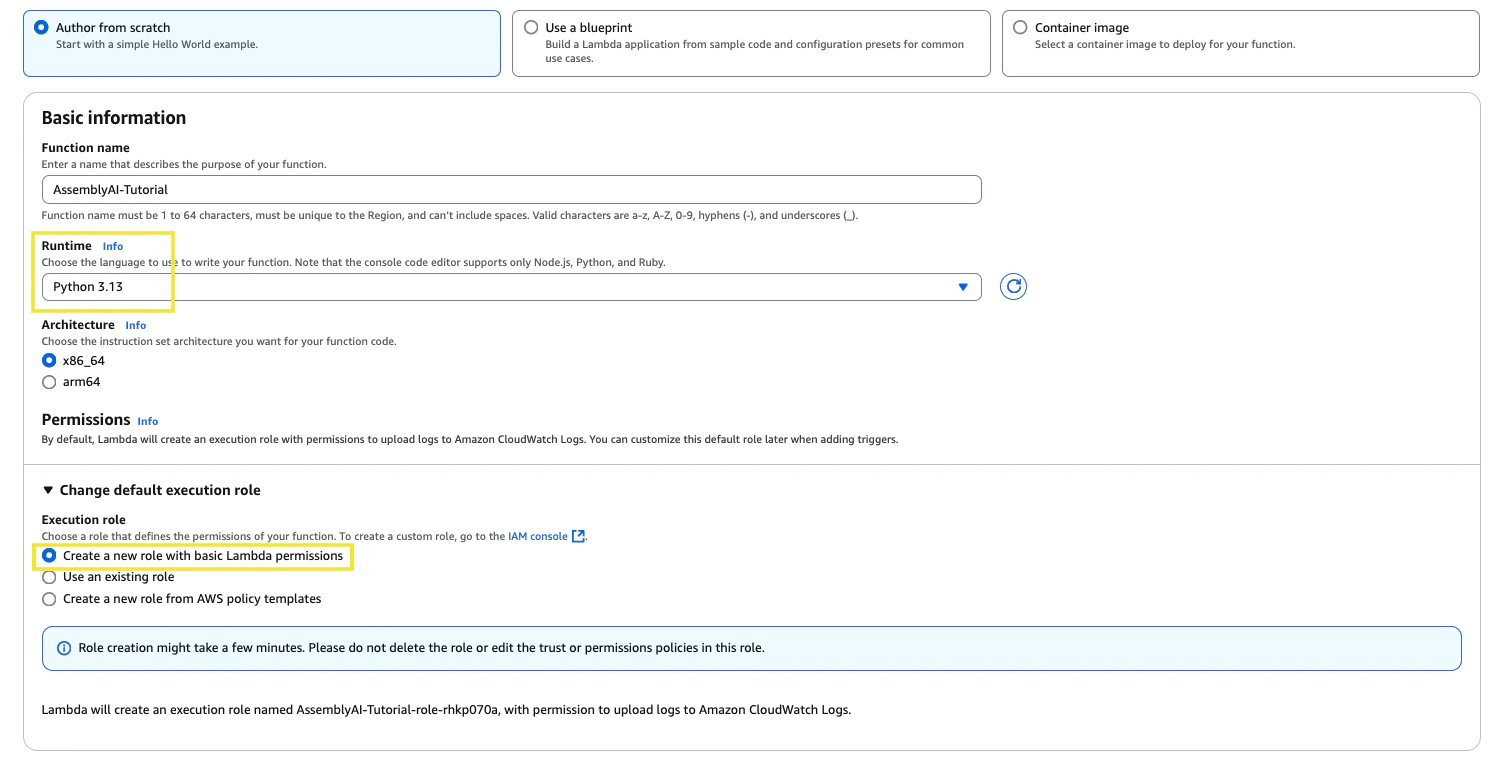
3
In this new function, scroll down to the Code Source section and paste the following code into
lambda_function.py.4
At the top of the lambda function, you can edit the config to enable features for your transcripts. To see all available parameters, check out our API reference.Once you have finished editing the lambda function, click Deploy to save your changes.
5
On the same page, navigate to the Configuration section, under General configuration adjust the timeout to 15min 0sec and click Save. The processing times for transcription will be a lot shorter, but this ensures plenty of time for the function to complete.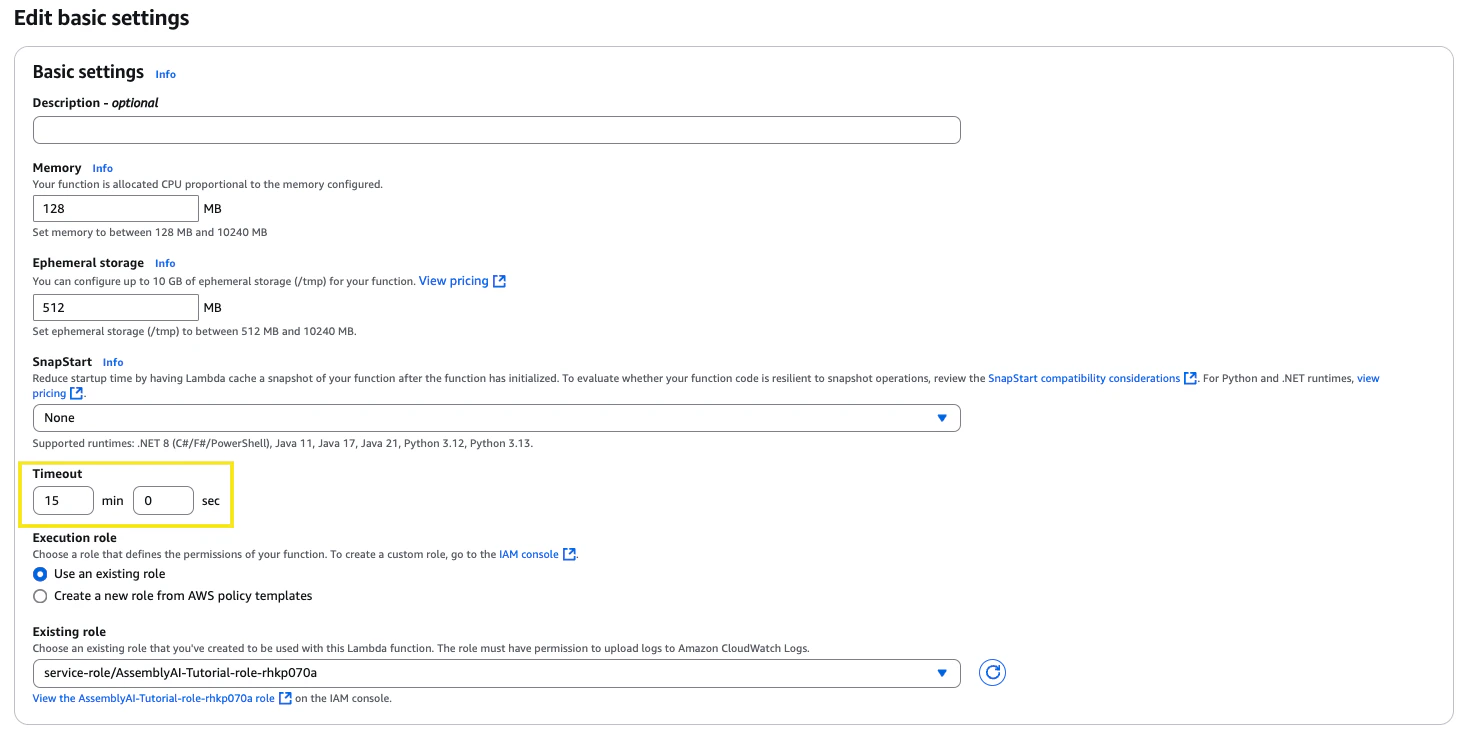
6
Now from this page, on the left side panel click Environment variables. Click edit and then add an environment variable, 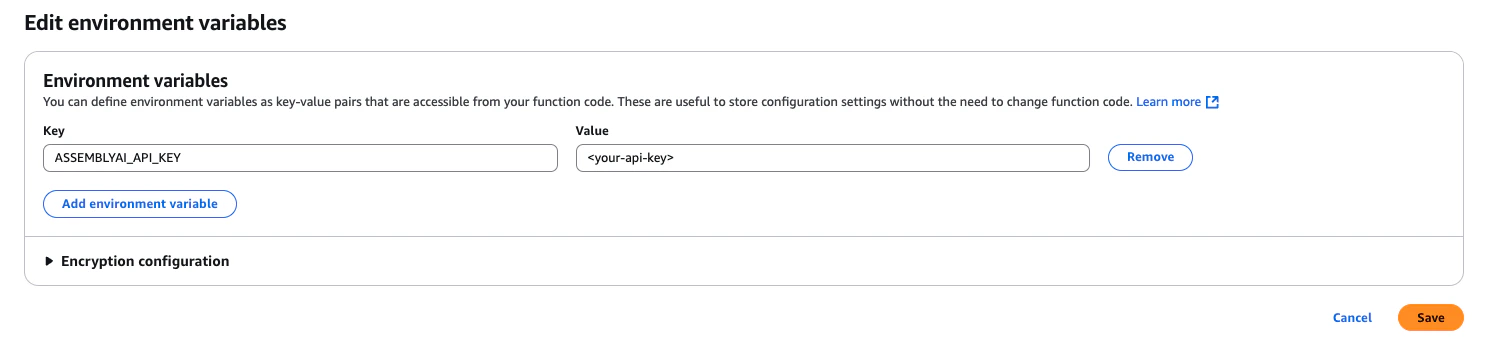
ASSEMBLYAI_API_KEY, and set the value to your AssemblyAI API key. Then click Save.7
Now, navigate to the IAM services page. On the left side panel under Access Management click Roles and search for your Lambda function role (it’s structure should look like 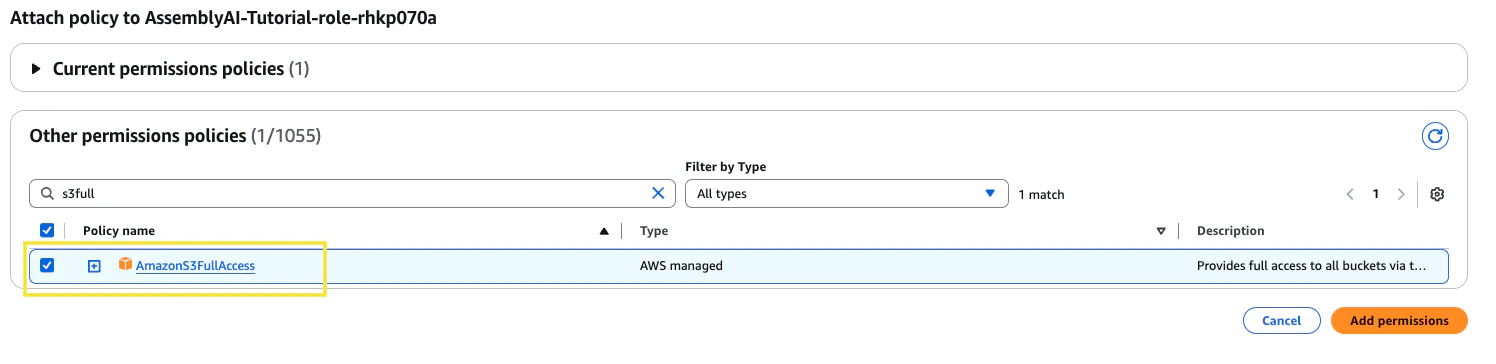
function_name-role-id). Click into the role and then in the Permissions policies section click the dropdown for Add permissions and then select Attach policies.From this page, find the policy named AmazonS3FullAccess and click Add permissions.8
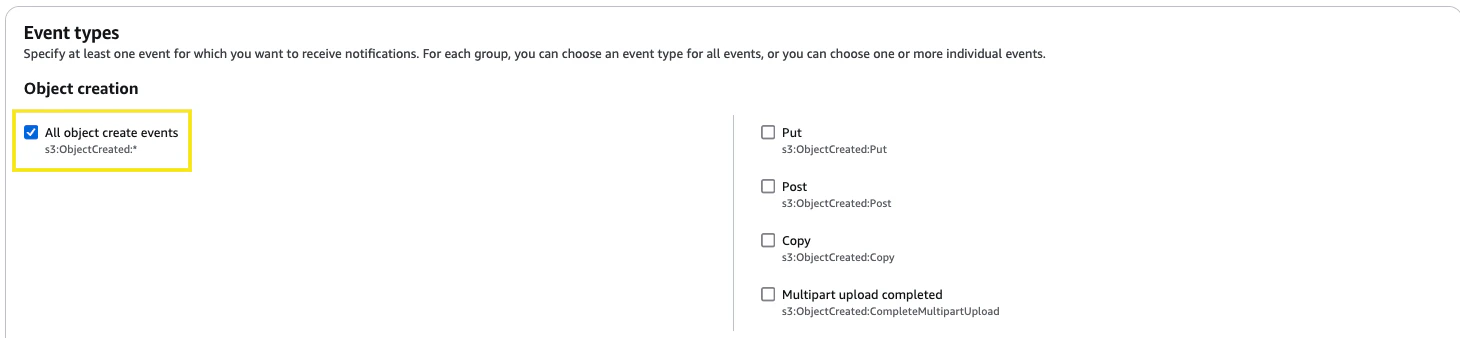
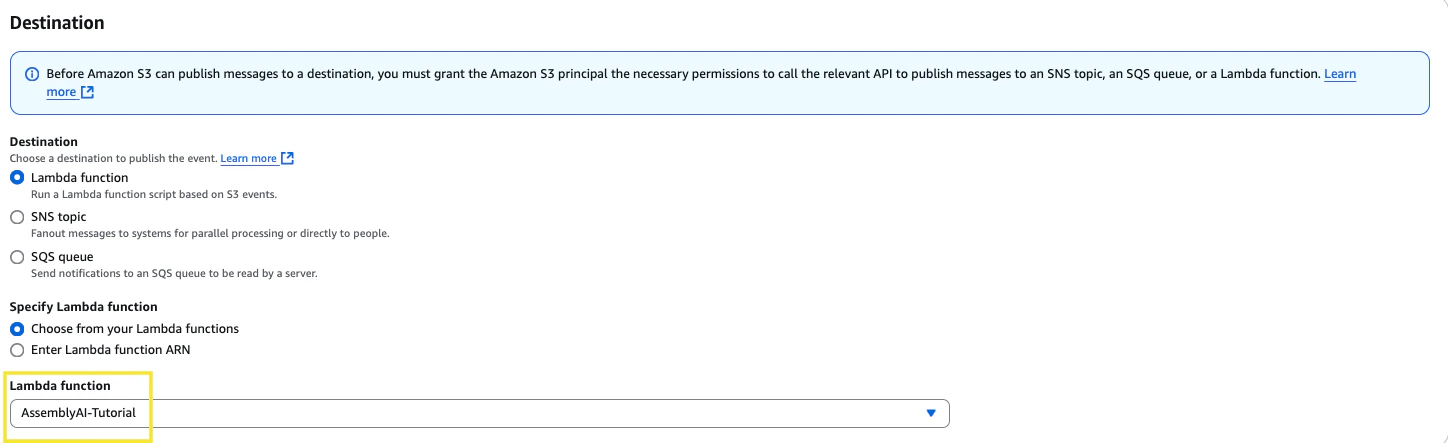
Now, navigate to the S3 services page and click into the general purpose bucket where your Amazon Connect recordings are stored. Browse to the Properties tab and then scroll down to Event notifications. Click Create event notification. Give the event a name and then in the prefix section, insert the folder path we noted from Step 1 to ensure the event is triggered for the correct folder.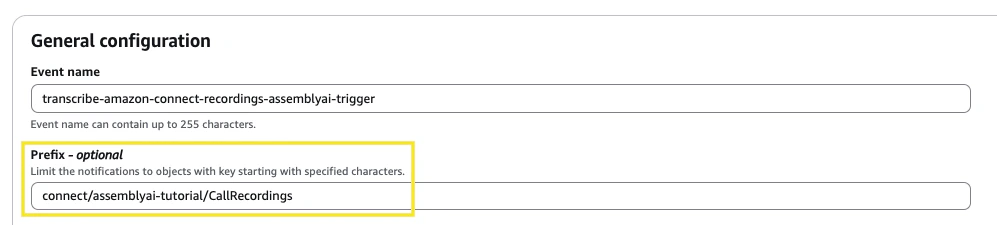
9
To finalise the integration, we’ll need to set the recording behaviour from within your AWS Contact Flows. Navigate to your Amazon Connect instance access URL and sign in to your Admin account. In the left side panel, navigate to the Routing section and then select Flows.Choose a flow to test with, in this case we’ll utilize the 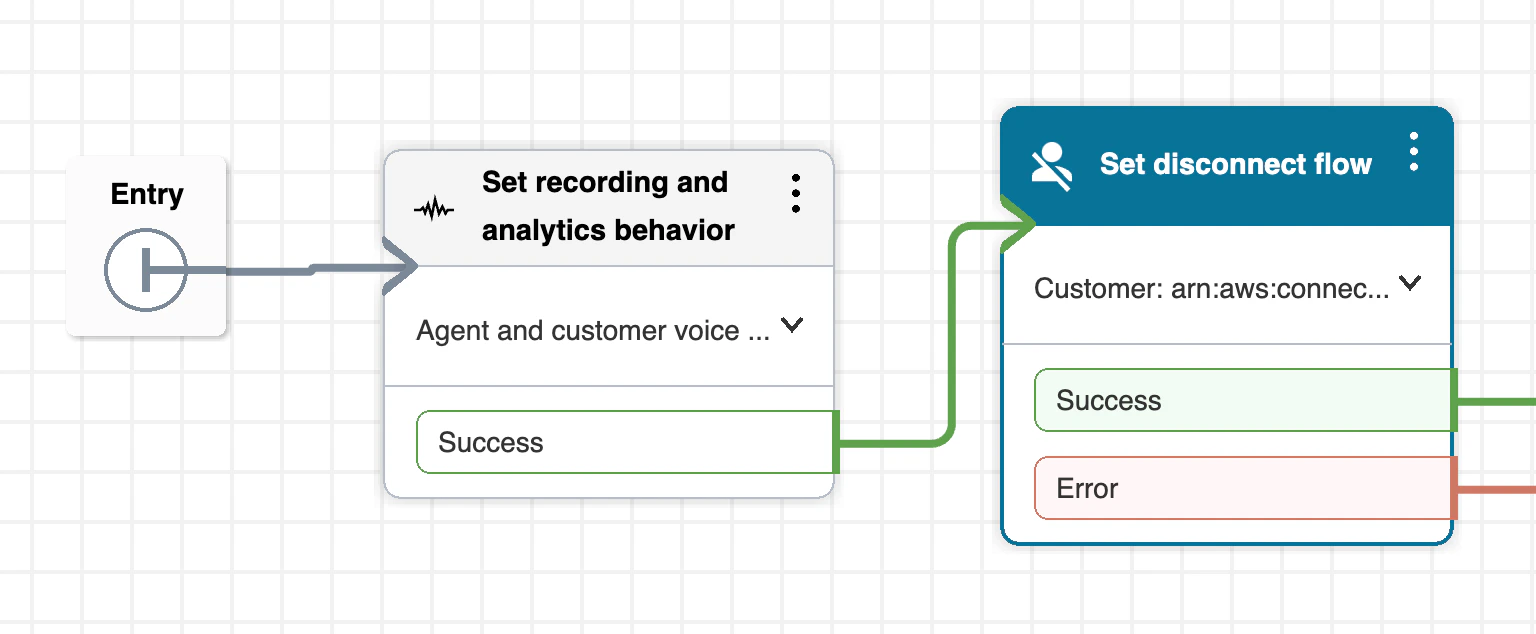

Sample inbound flow (first contact experience). You should see the Block Library on the left hand side of the page. In this section, search for Set recording and analytics behaviour and then drag the block into your flow diagram and connect the arrows.You can see in our example, we place the block right at the entry of the call flow:On and select Agent and customer (or whoever you’d like to record). Then click Save, click Save again in the top right and then click Publish to publish the flow.The Amazon Connect Call Recordings are saved in the S3 bucket with this naming convention:
/connect/{instance-name}/CallRecordings/{YYYY}/{MM}/{DD}/{contact-id}_{YYYYMMDDThh:mm}_UTC.wavThe AssemblyAI Transcripts will be saved in the S3 bucket with this naming convention:
/connect/{instance-name}/AssemblyAITranscripts/{YYYY}/{MM}/{DD}/{contact-id}_{YYYYMMDDThh:mm}_UTC.json
10
To view the logs for this integration, navigate to the CloudWatch services page and under the Logs section, select Log groups. Select the log group that matches your Lambda to view the most recent log stream.